[Step by Step] Installing and configuring Active Directory Rights Management Service 2016
Let me start with the introduction of Active Directory Rights Management Service 2016 aka AD RMS 2016. AD RMS 2016 is nothing more than a role service on the Windows Server 2016. If you revisit all the roles on the Windows Server 2016, you can see AD RMS as one of them. This role was debuted in Windows server 2003, with client API libraries made available for Windows 2000 and later. The Right Management clients is included in Windows Vista and later but also available for Windows XP, Windows 2000 or Windows Server 2003. Not only that, there is an implementation of AD RMS in Office for Mac to use right protection in OS X and also for Android, Blackberry OS, IOS and Windows RT too.
So, what AD RMS do… that would be the great question to be asked by anyone. If I have to explain it… I would say “it is an Information Right Management tool, which specify what kind of right to be given to whom for which document that has been created by me.”. So, ADRMS uses encryption and a form of selective functionality denial for limiting access to documents such as corporate e-mails, Microsoft office documents, and the operations authorized users can perform on them. Companies can use this technology to encrypt information stored in such document formats, and through policies embedded in the documents, prevent the protected content from being decrypted except by specified people or groups, in certain environments, under certain conditions, and for certain periods of time. Specific operations like printing, copying, editing, forwarding, and deleting can be allowed or disallowed by content authors for individual pieces of content, and RMS administrators can deploy RMS templates that group these rights together into predefined rights that can be applied.
NOTE: it is not recommended to install AD RMS on Active Directory Installed machine or on Domain Controller because If you do install AD RMS on a domain controller, you must add the AD RMS service account, which is normally configured with no additional permissions, to the Domain Admins group.
Configuring Pr-requisites
Before starting the installation and configuration of AD RMS, we need to have one Local Certificate Authority (CA), users and group as of below, and one FQDN for ‘rms’
| User | Quantity | Lab Users |
| RMS Administrator | 1 | rmsadmin |
| RMS Service Account | 1 | rmssrv |
| RMS Super User Group | 1 | rmssu |
After creating these users on Active Directory Users and computer, we need to create a new FQDN for RMS server to get assign for https port. For my lab purpose created ‘rms.pdhewaju.com.np’ for cluster address.
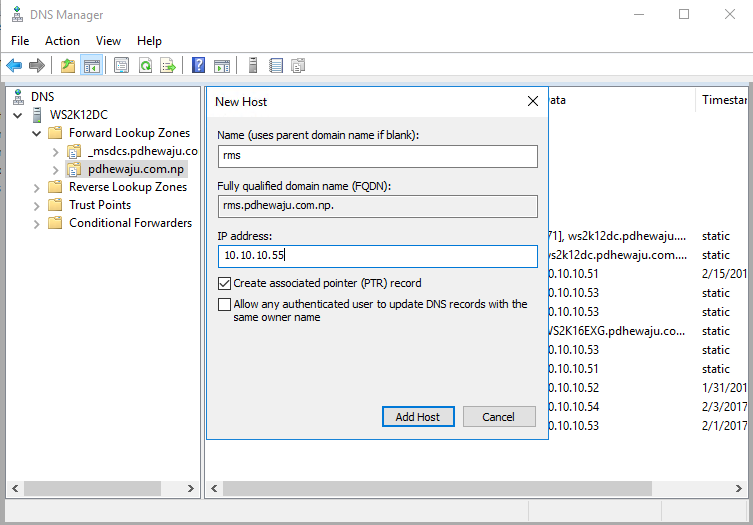
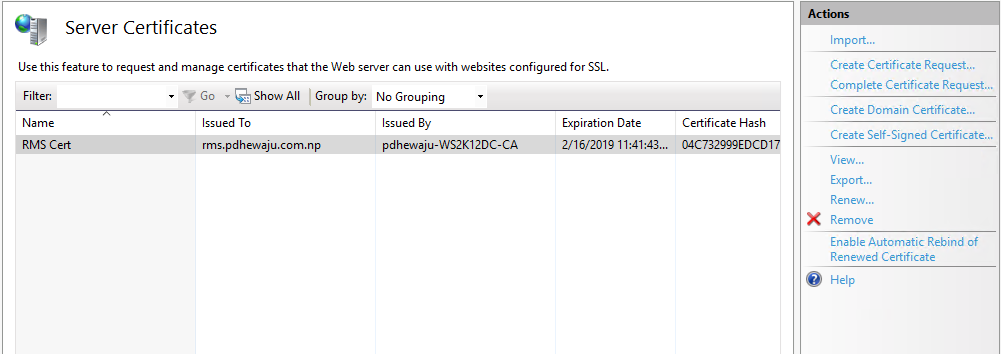
After creating the FQDN for cluster address, it is time to create a domain certificate for this server. To add certificate, open your ‘Internet Information Services (IIS) Manager’, select your machine name and double click on ‘Server Certificate’.
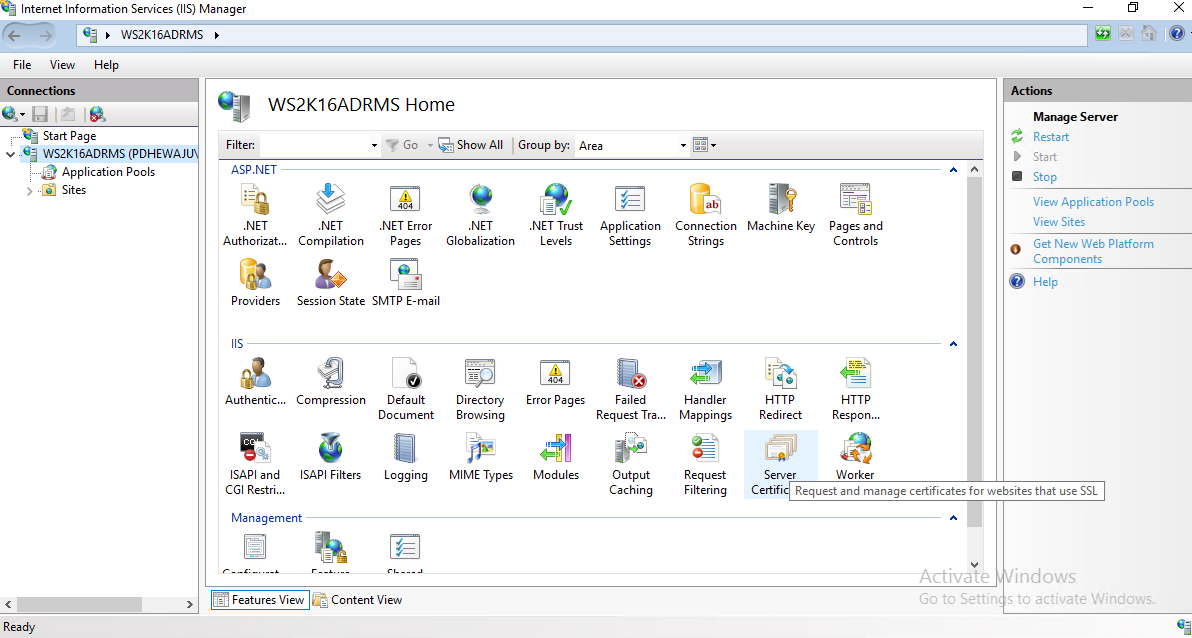
On the ‘Server Certificates’, select ‘Create Domain Certificate..’ on the Actions panel.

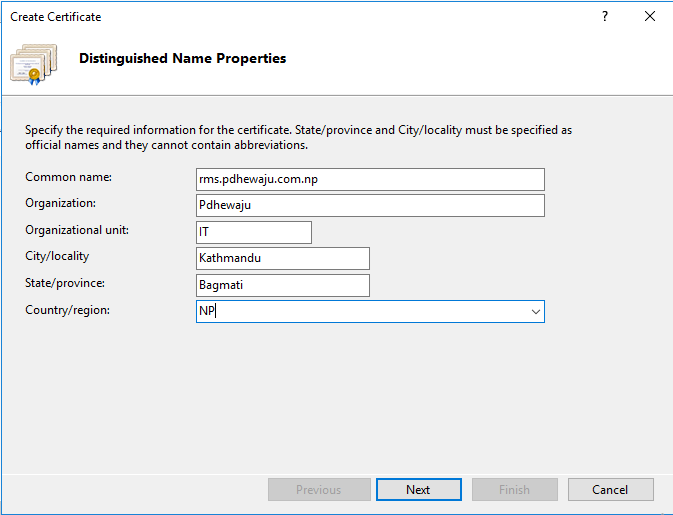
A new window will get open with ‘Create Certificate’ provide the FQDN of cluster address as a common name of the Certificate, provide all the information and click on ‘Next’.
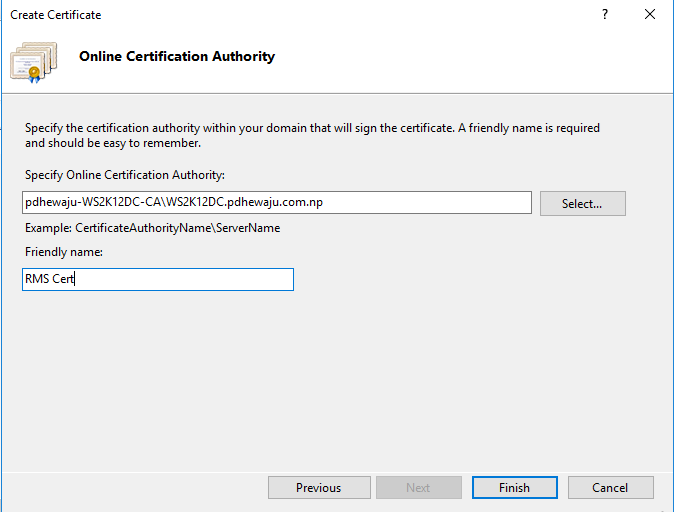
On the ‘Online Certification Authority’ click on ‘Select’ and select your local certificate server as well provide ‘Friendly Name’ and click on ‘Finish’.
A new certificate is created and assigned to the server, you can verify by opening server certificate.
Installing AD RMS
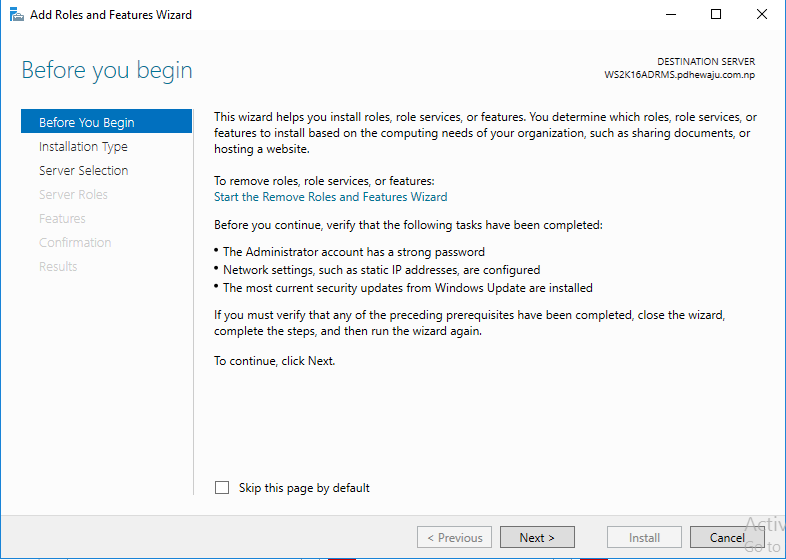
To Install the AD RMS, Open ‘Server Manager’ and click on ‘Add Roles and Features’. A new Wizard will get open to add Roles and Features, click ‘Next’ on it.
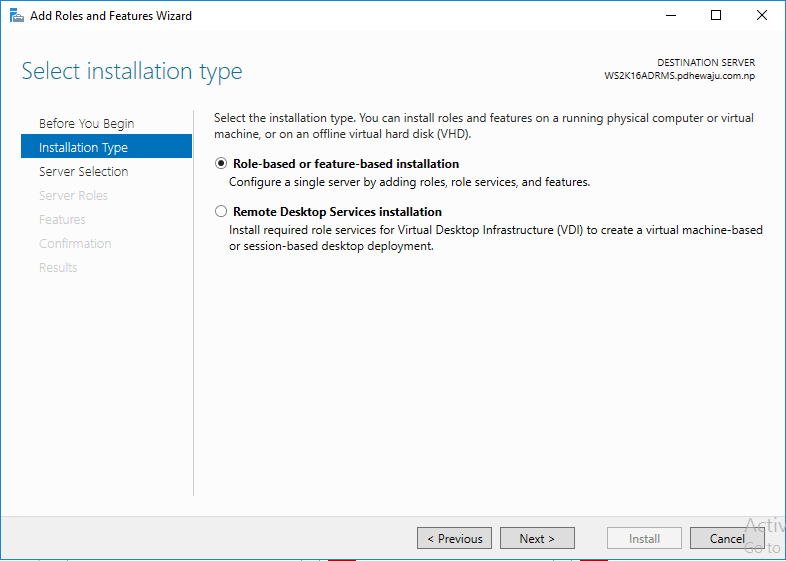
At ‘Select Installation type’, select ‘Role-based or feature-based installation’ and click on ‘Next’.
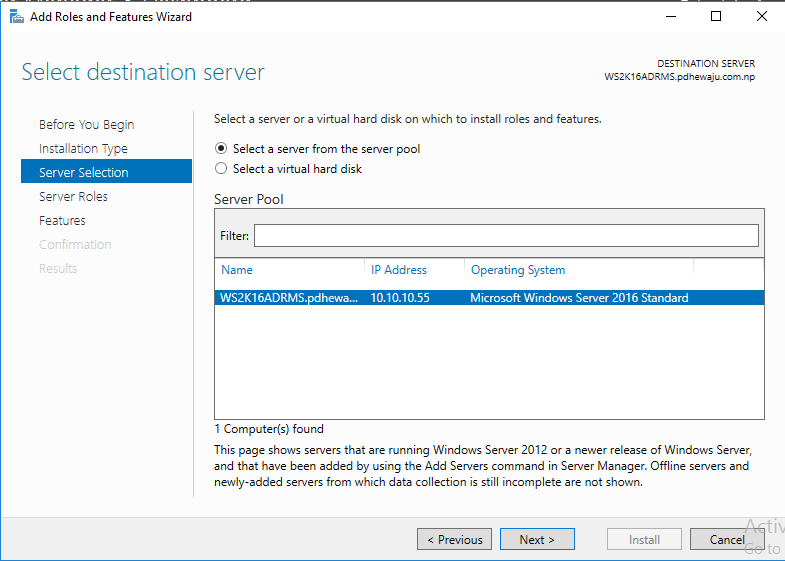
On ‘select destination server’, select the server on which you want to install the role of AD RMS and click on ‘Next’.
For ‘Select server roles’, select ‘Active Directory Rights Management Service’ and click on ‘Next’.
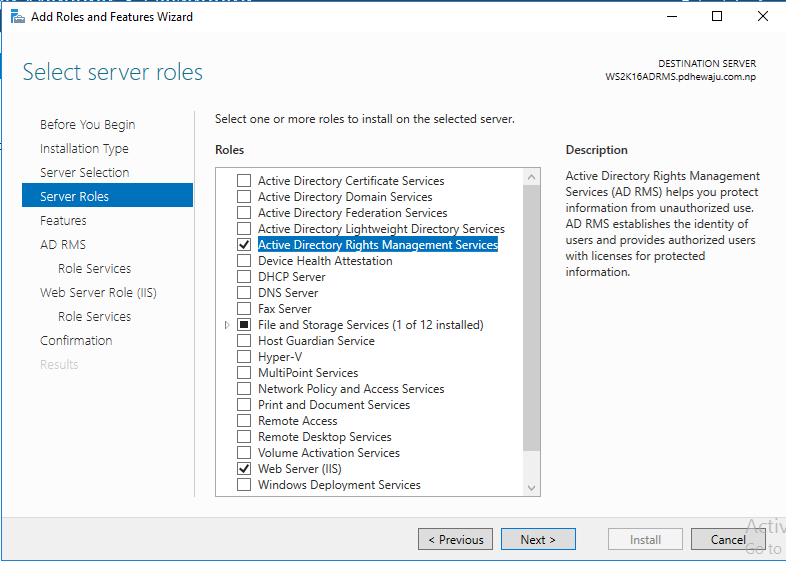
At ‘Select features’, let it be as it is as we don’t need any features for now so click on ‘Next’.
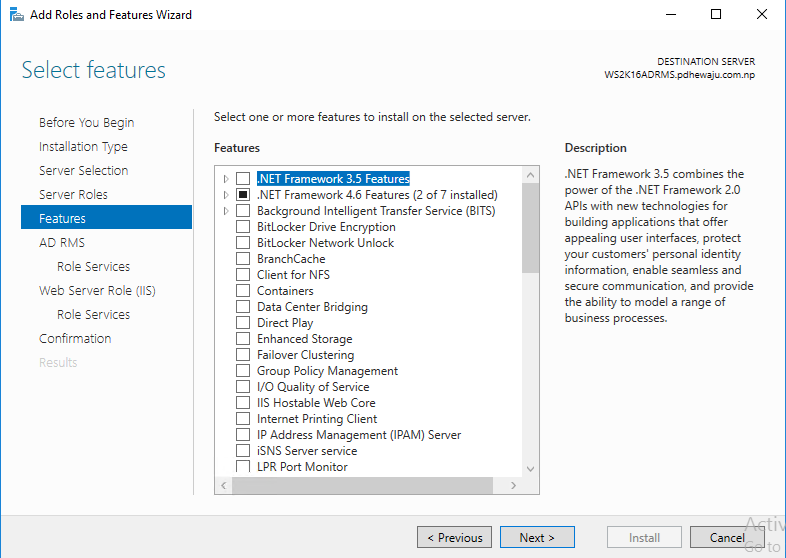
In ‘Active Directory Rights Management Services’ screen you will see the description of AD RMS so click on ‘Next’.
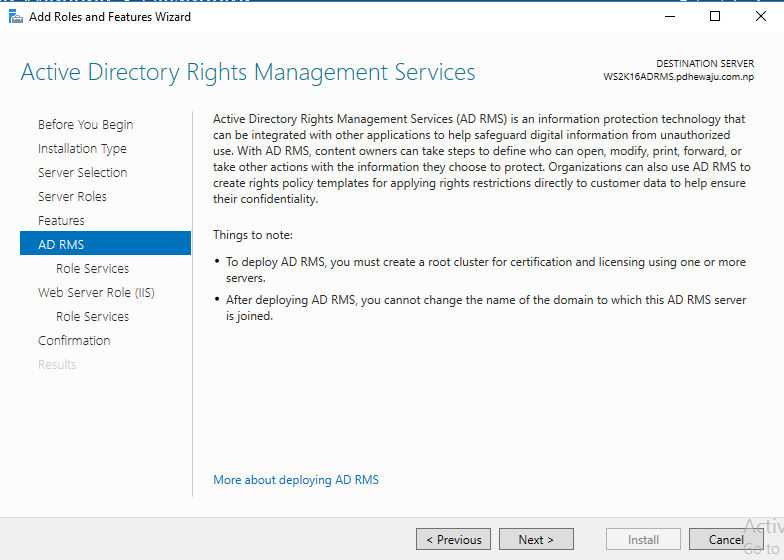
On ‘Select role services’ select ‘Active Directory Rights Management Server’ and click ‘Next’. As we are not going to do this on multiple forest, we will be ignoring identity federation support.
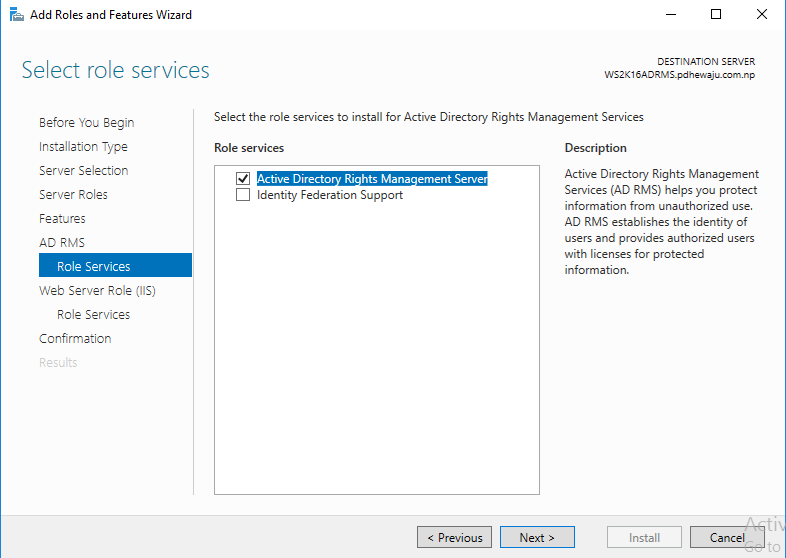
On ‘web server role (IIS)’ select ‘Next’.
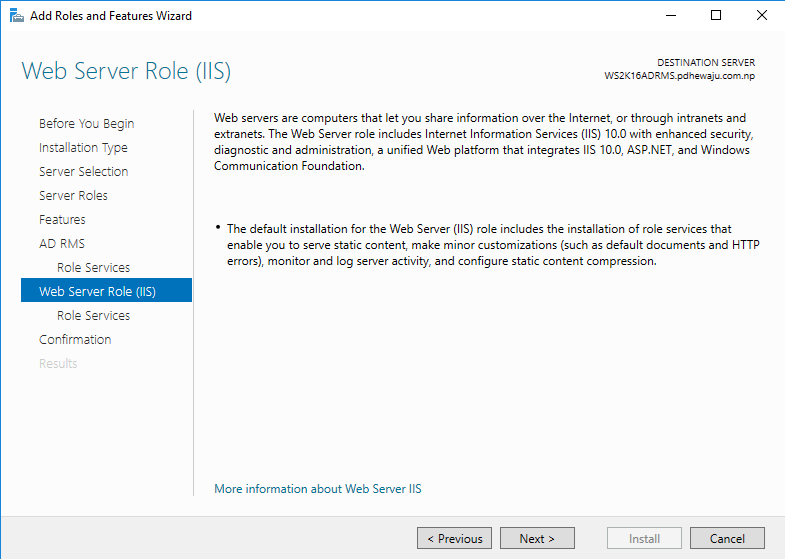
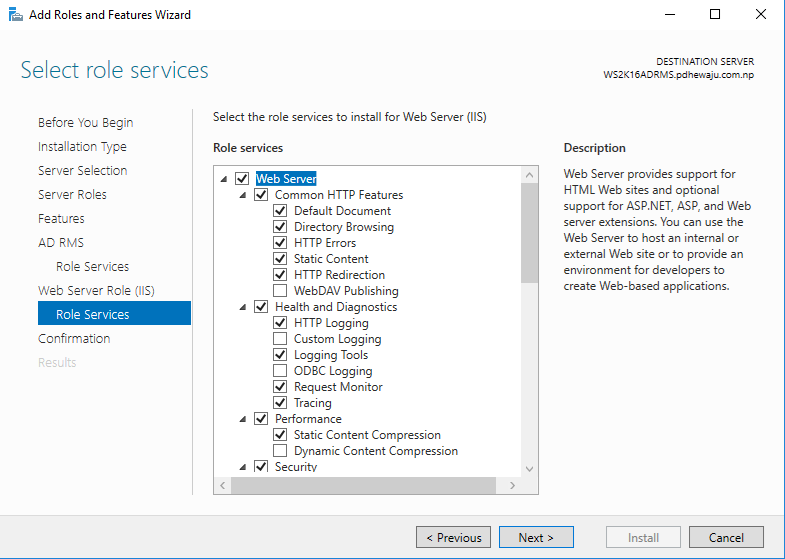
For the ‘select role services’ let it be as it is and click on ‘Next’.
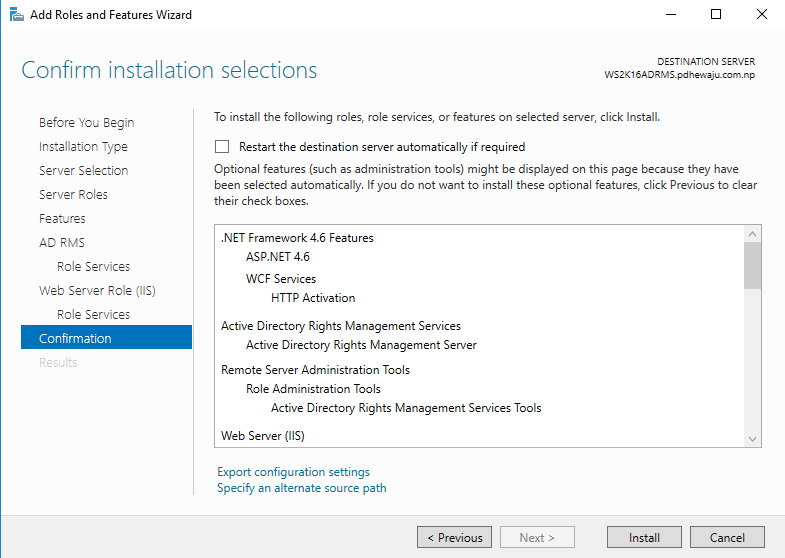
At last at the confirmation Screen click on ‘Install’. It will take around 10-15 minutes to get complete the installation as per the machine specs.
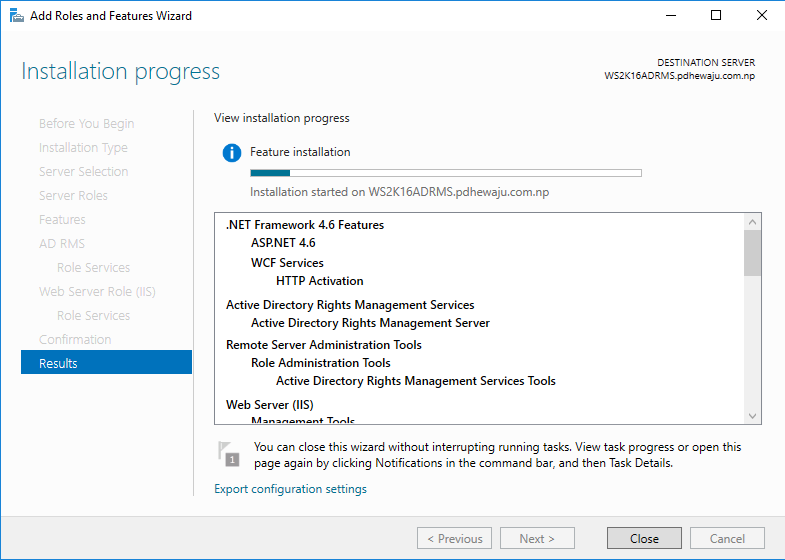
Once the installation process is complete, click on ‘Perform additional configuration’ to configure RMS server.
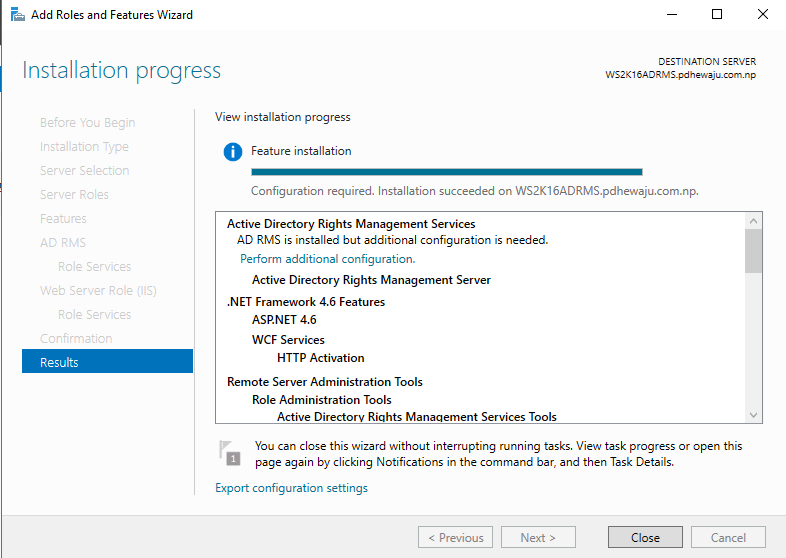
Configuring AD RMS:
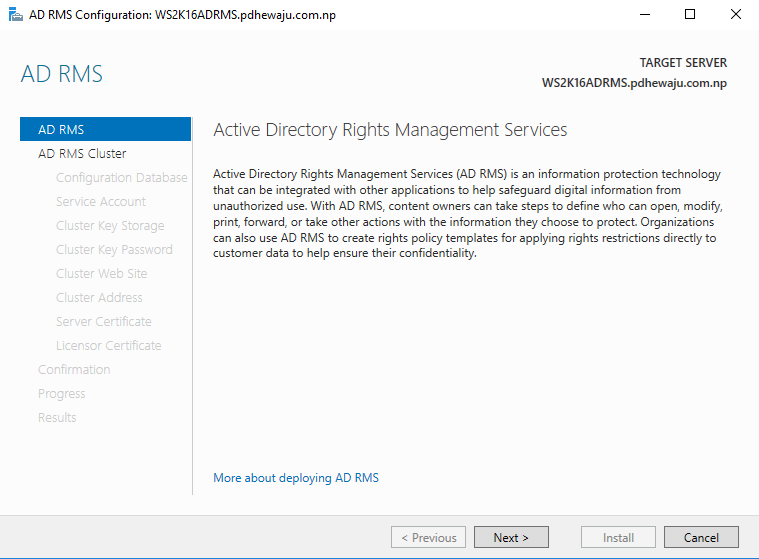
A new window for the configuration for the AD RMS will get open click on ‘Next’ to start configuring AD RMS Cluster.
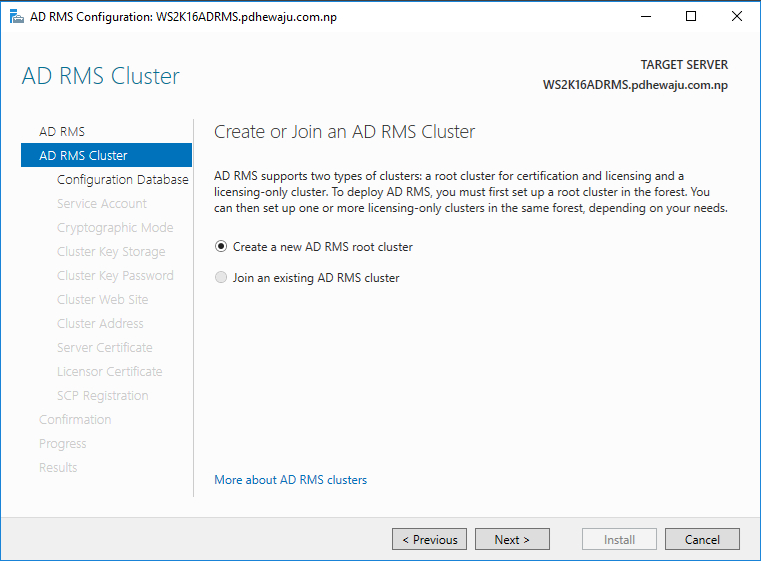
If this is a new Cluster, select ‘Create a new AD RMS root Cluster’ but if you do have already one you can select ‘Join an existing AD RMS cluster’ and create a FARM environment.
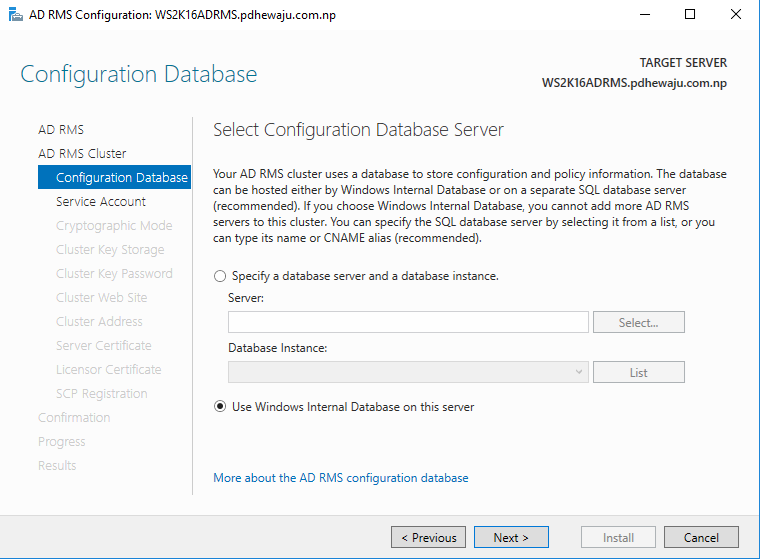
If you do have a FARM environment, you should have a SQL DATABASE installed. But for the standalone, you can just use Windows Internal Database.
On ‘Service Account’, specify the service account that we had created earlier and click on ‘Next’.
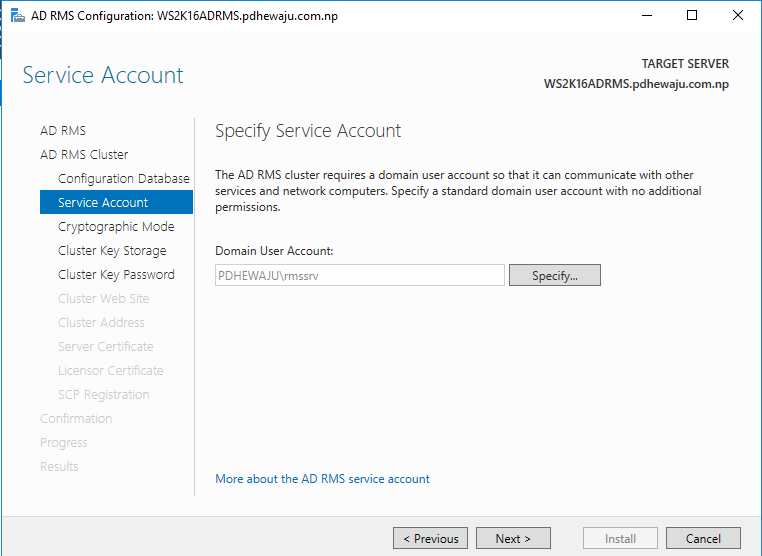
If you are going to use this AD RMS on the email server earlier than Exchange 2010 SP2, it is better to select Cryptographic Mode 1 as they do not support SHA 256 hashes. But if you do have higher version you can select Cryptographic Mode 2, and also you can upgrade your Cryptographic Mode any time from 1 to 2.
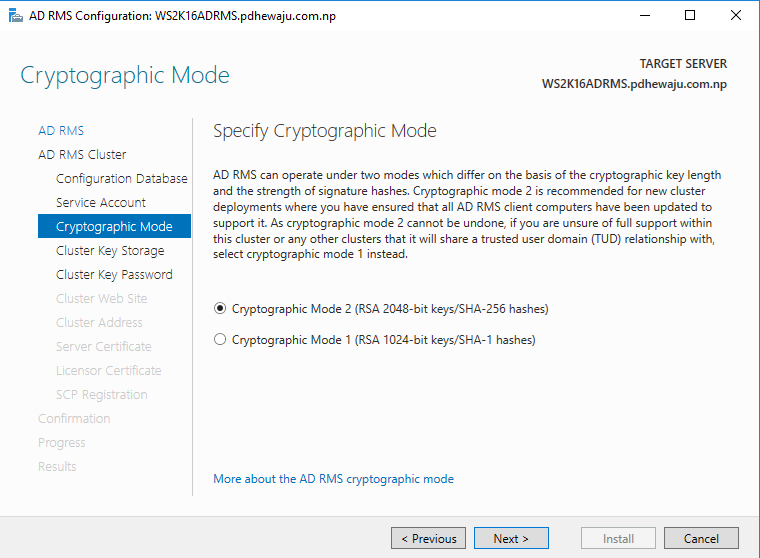
For ‘Cluster Key Storage’, select ‘Use AD RMS centrally managed key storage’ and click on ‘Next’.
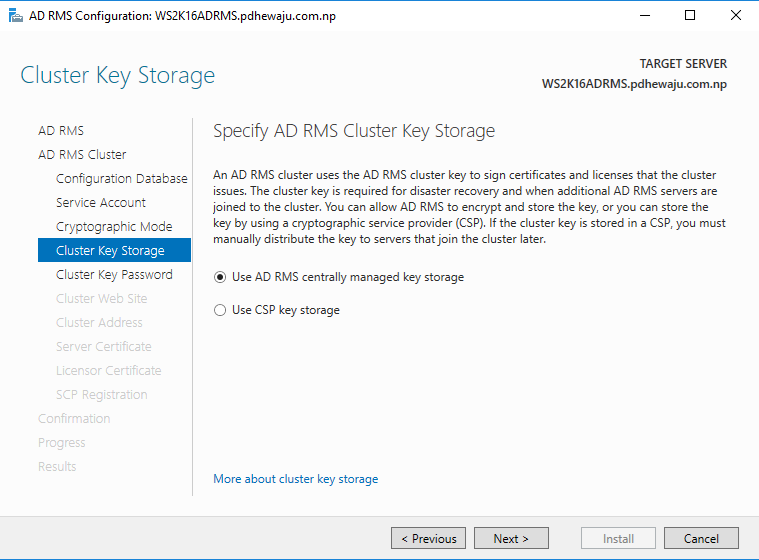
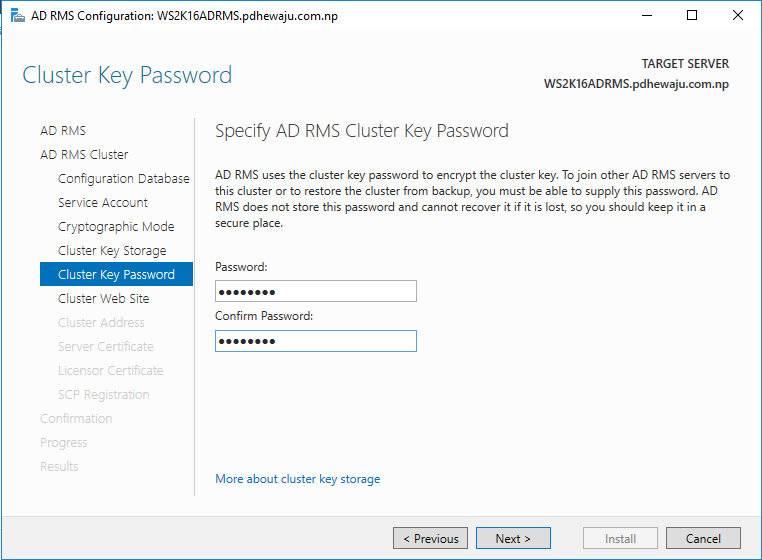
Provide the ‘Cluster Key Password’ and click on ‘Next’.
For the ‘Cluster Web Site’ you can choose the ‘Default Web Site’ and click on ‘Next’. Although this machine is dedicated to AD RMS
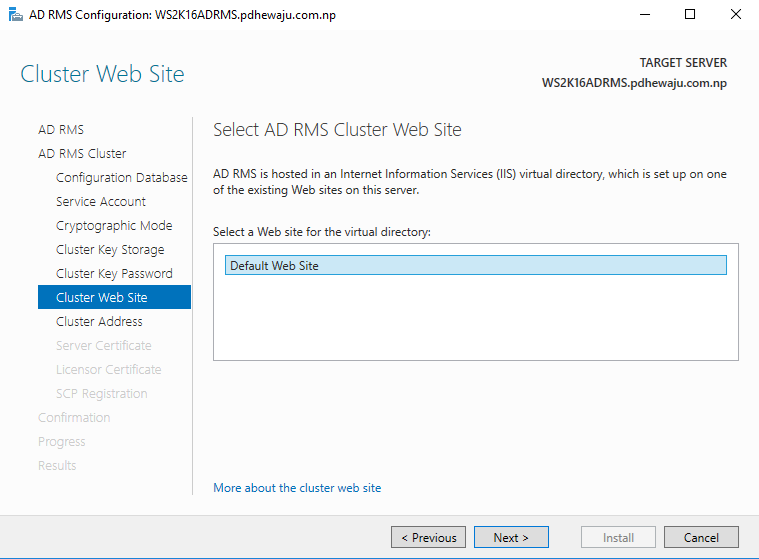
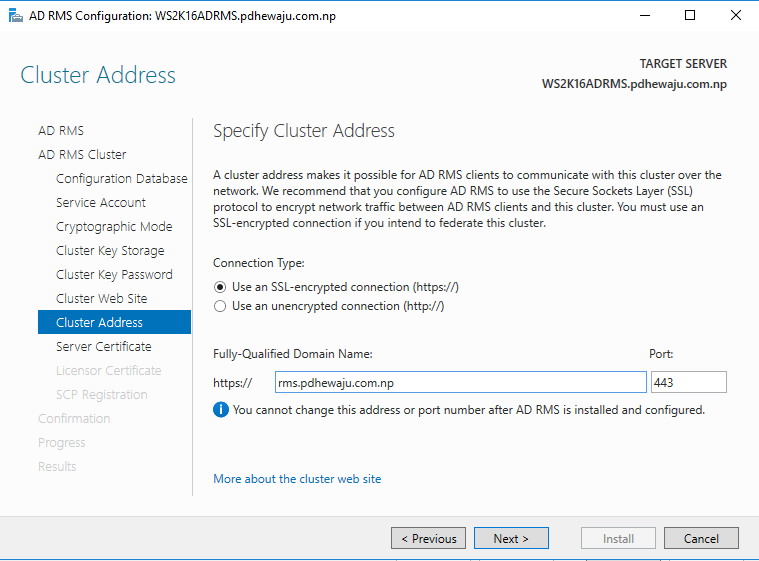
On ‘Cluster Address’, provide the FQDN which we have created earlier and click on ‘Next’.
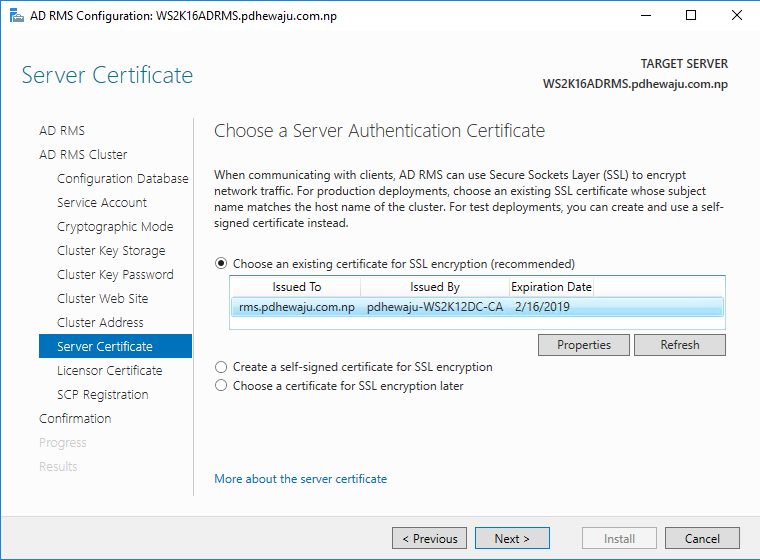
Now on ‘Server Certificate’ select the domain certificate, that has been created to this server and click on ‘Next’.
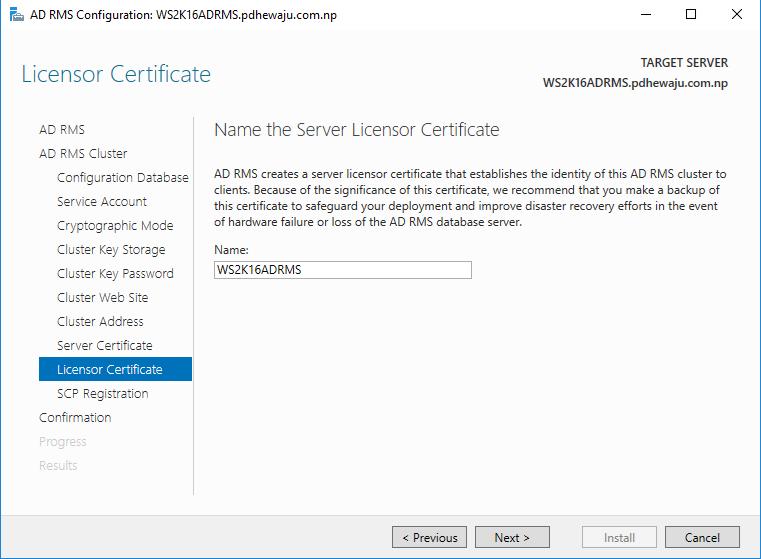
Provide ‘Licensor Certificate’ name and click on ‘Next’.
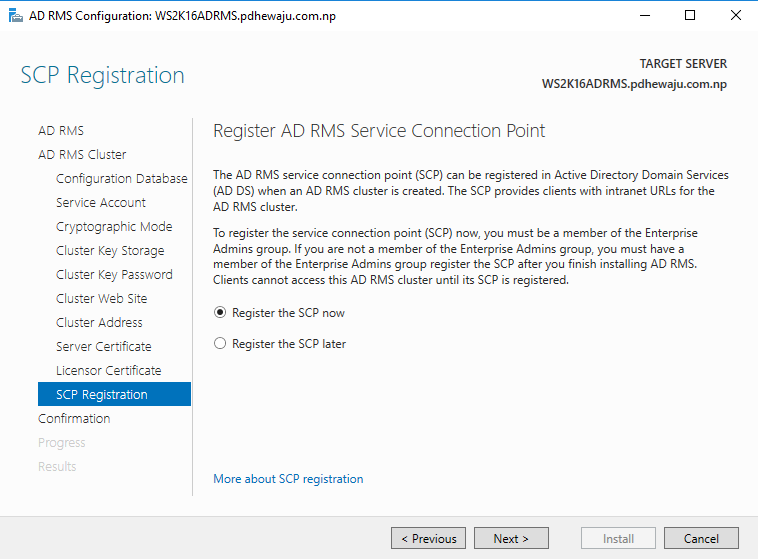
For ‘SCP Registration’ select ‘Register the SCP now’ and click on ‘Next’.
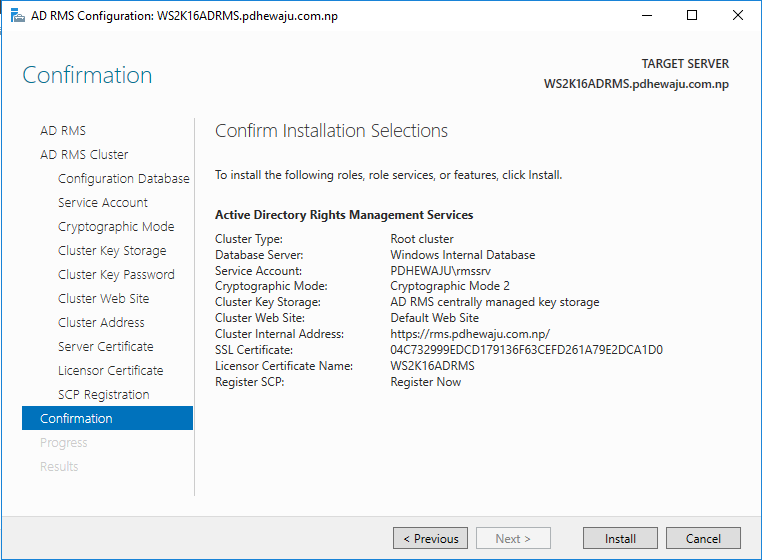
On ‘Confirmation’ check the configuration, if all is set click on ‘Install’.
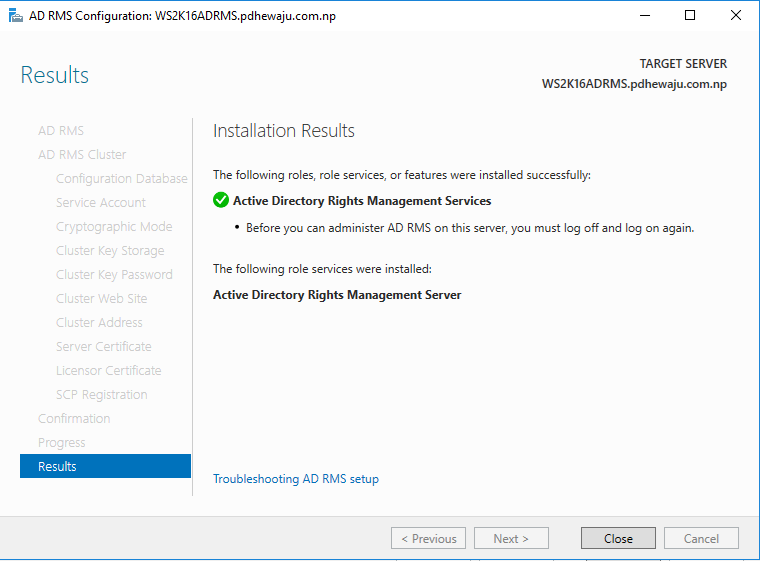
To complete the installation, it will take around 5-10 minutes. Once completed, click on ‘Close’.
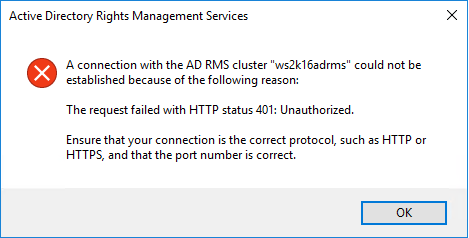
Now, after the installation if you try to open the AD RMS console, you will get an error like below. Hence it is better, if you logoff after the completion of the installation and login again.
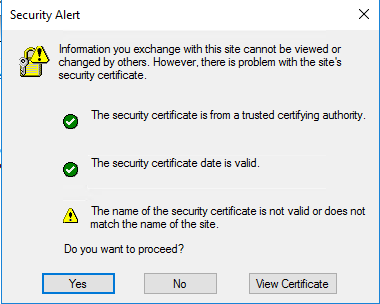
So, when your login back and when you open the console for the certificate validation, you can just click in ‘Ok’ to proceed.
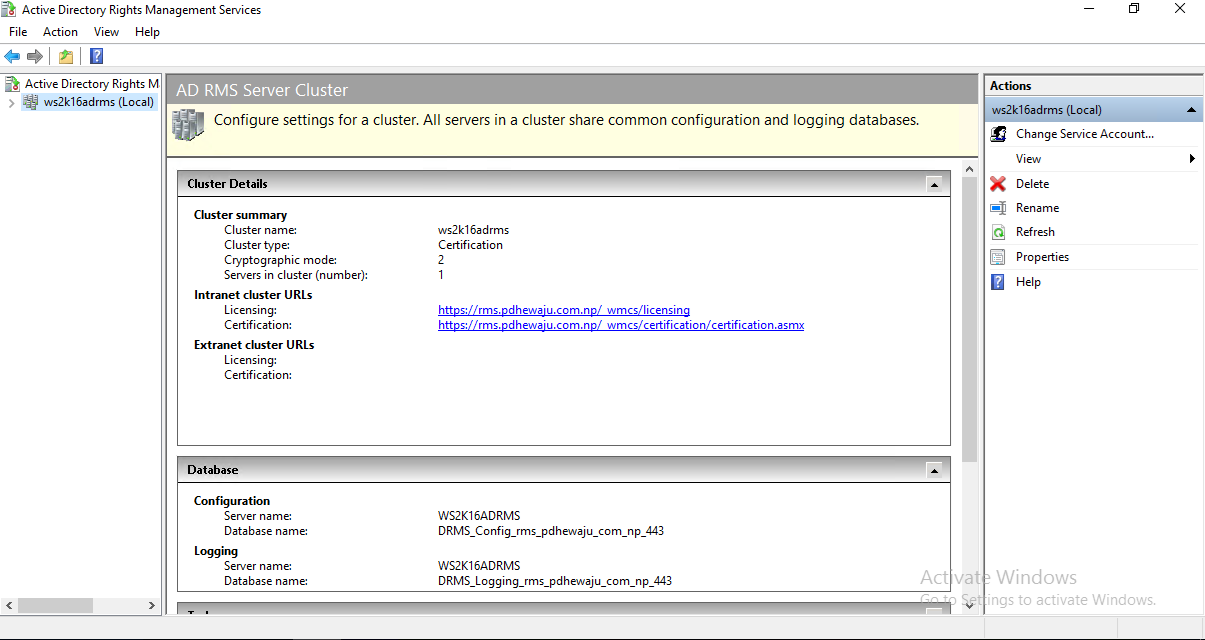
Now, the console is good and you can see it healthy.
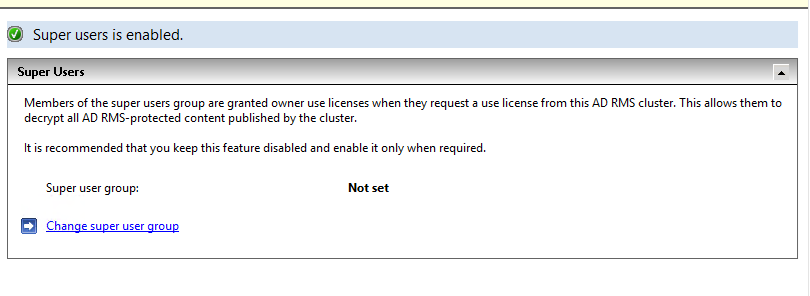
Before starting any configuration with AD RMS you need to do one last thing, that is enabling and assigning super users. Super Users is a group. To get it enable, expand ‘Security Policies’, right click on ‘Super Users’ and select ‘Enable Super Users’.

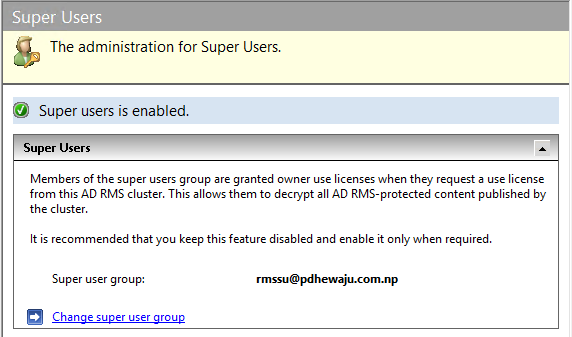
To define super users, click on ‘Change super user group’ and provide the Super user group that has been created earlier.
And that’s all, you can see the Super User Group getting defined.
This how we can install and configure Basics of AD RMS, for the usage, integration and configuration with other application keep watching the this blog. 🙂
Related Posts
![[Solved]convert .vbs script to .exe](/wp-content/themes/ribbon-lite/images/nothumb-related.png)
[Solved]convert .vbs script to .exe

Virtualization Beyond the wall…

WAN party with Windows 7.
About Author
pdhewjau
Prashant is a Principal Cybersecurity Specialist at Thakral One Nepal. His prior position as a Modern Work Security Specialist at Microsoft saw him providing invaluable guidance to major clients in Bangladesh, Brunei, Cambodia, and Myanmar, assisting them with their foundational security needs. Awarded the esteemed Microsoft Most Valuable Professional (MVP) accolade in 2017, Prashant is recognized globally among Microsoft peers. Since 2010, he has imparted his expertise as a Microsoft Certified Trainer (MCT), conducting specialized training across Nepal.
Add a Comment
Cancel reply
This site uses Akismet to reduce spam. Learn how your comment data is processed.
this informtion is very usefull on coming days also wish more u will provide information