[Step by Step] Installing Exchange 2019
Hi Guys, it has been almost more than week that Exchange 2019 RTM (Release to Market) has been public. On this blog, I will be sharing knowledge on step by step installing Exchange 2019 as well as pre-requisites of it. Basic architecture of Exchange 2019 is similar to the Exchange 2016. In detail will be posting on my next blog.
Starting with pre-requisites of Exchange 2019. For Detail, visit here
Operating system
The supported operating systems for Exchange 2019 are described in the following table:
| Exchange component | Requirement |
| Mailbox and Edge Transport server roles | Windows Server 2019 Standard or Datacenter |
| Management tools | One of the following versions of Windows: • Windows Server 2019 Standard or Datacenter • 64-bit edition of Windows 10 |
Notes:
- Installing Exchange 2019 on a computer that’s running Windows Server Core is fully supported and recommended. The Desktop Experience feature is no longer required.
- Installing Exchange 2019 on a computer that’s running Nano Server isn’t supported.
Exchange 2019 Mailbox servers on Windows Server 2019
-
Install the following software:
a. .NET Framework 4.7.2 or later
b. Visual C++ Redistributable Package for Visual Studio 2012
Note: you need to make sure you install visual studio 2012 instead of visual studio 2013 else you will face this issue.
- Add the required Lync Server or Skype for Business Server components:
a. Install the Server Media Foundation windows feature by executing the following command in Windows PowerShell:
Install-WindowsFeature Server-Media-Foundation
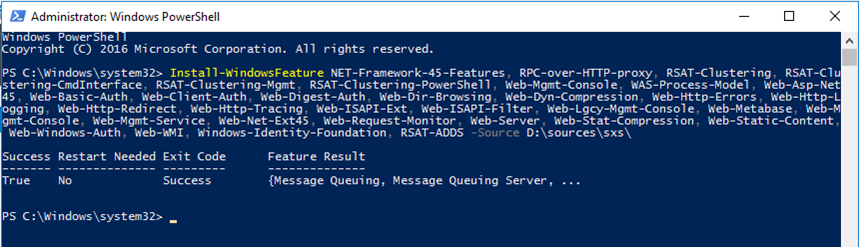
b. Install Unified Communications Managed API 4.0. This package is available for download and in the \UCMARedist folder on the Exchange Server media.
Install-WindowsFeature NET-Framework-45-Features, RPC-over-HTTP-proxy, RSAT-Clustering, RSAT-Clustering-CmdInterface, RSAT-Clustering-Mgmt, RSAT-Clustering-PowerShell, Web-Mgmt-Console, WAS-Process-Model, Web-Asp-Net45, Web-Basic-Auth, Web-Client-Auth, Web-Digest-Auth, Web-Dir-Browsing, Web-Dyn-Compression, Web-Http-Errors, Web-Http-Logging, Web-Http-Redirect, Web-Http-Tracing, Web-ISAPI-Ext, Web-ISAPI-Filter, Web-Lgcy-Mgmt-Console, Web-Metabase, Web-Mgmt-Console, Web-Mgmt-Service, Web-Net-Ext45, Web-Request-Monitor, Web-Server, Web-Stat-Compression, Web-Static-Content, Web-Windows-Auth, Web-WMI, Windows-Identity-Foundation, RSAT-ADDS -source d:\sources\sxs\
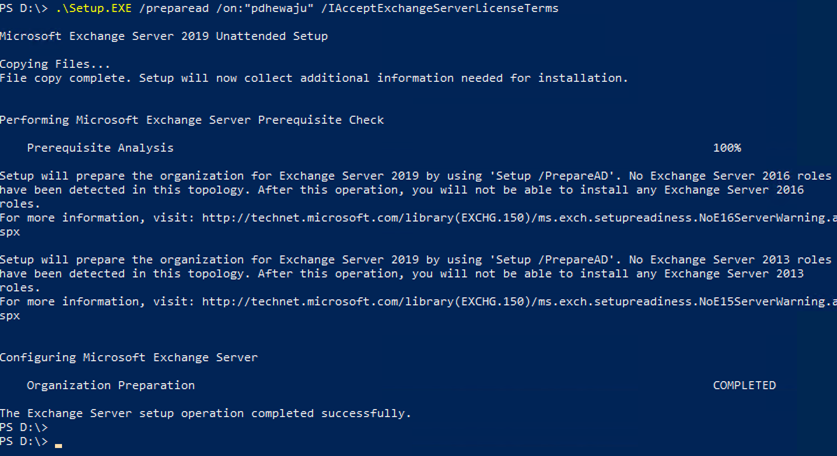
After installing the prerequisites, it’s time to prepare Active Directory for Exchange 2019 using cmdlet
Setup.exe /preparead /on:"organizationname" /IAcceptExchagneServerLicenseTerms
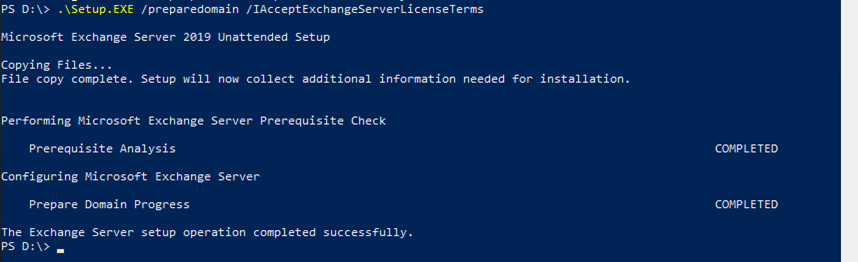
Now, Preparing Domain with cmdlet
Setup.exe /preparedomain /IAcceptExchangeServerLicenseTerms
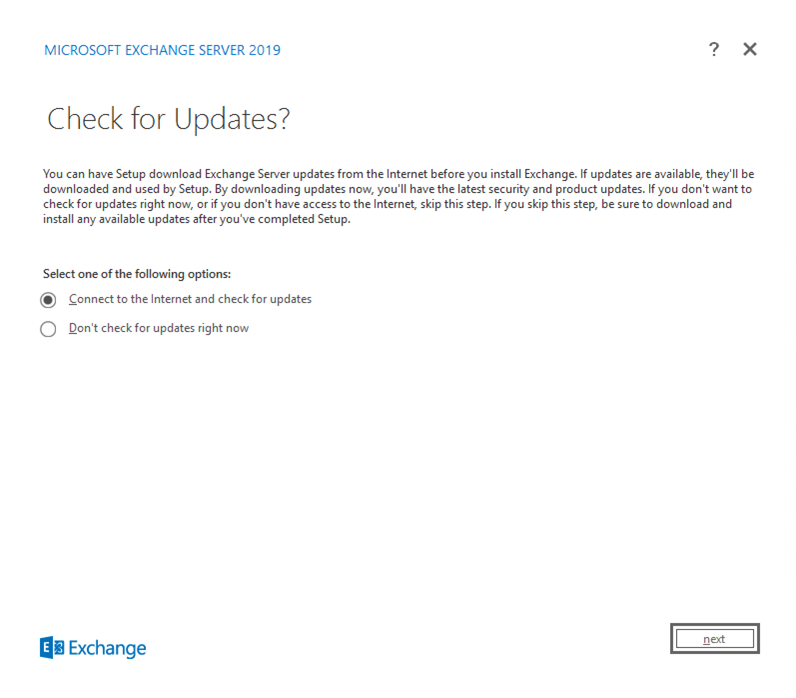
Once the pre-requisites is complete, it’s time to install exchange. Open the Exchange 2019 ISO and run Setup.exe. On the ‘Check for Update?’ Select ‘Don’t Check for updates right now’ and click on ‘Next’.
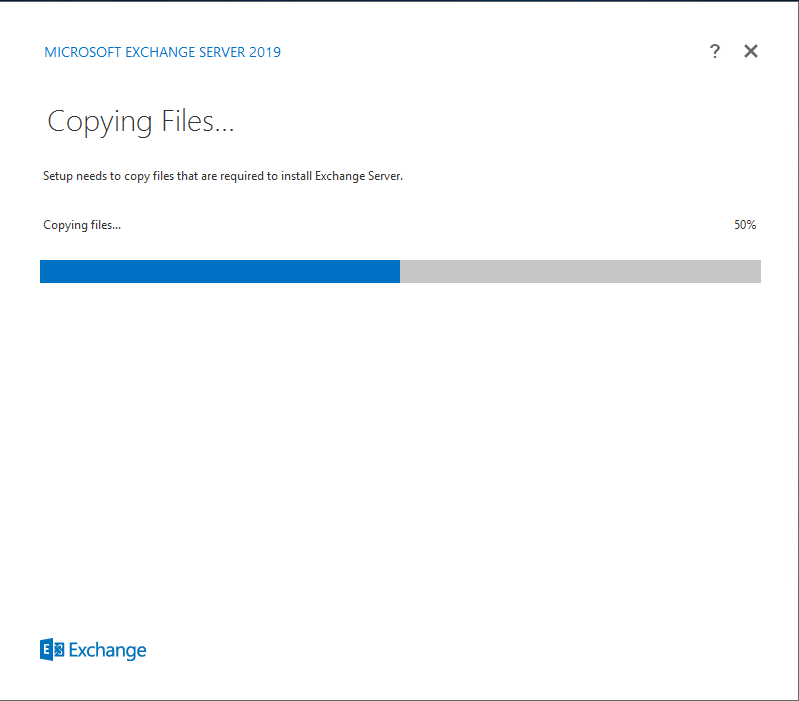
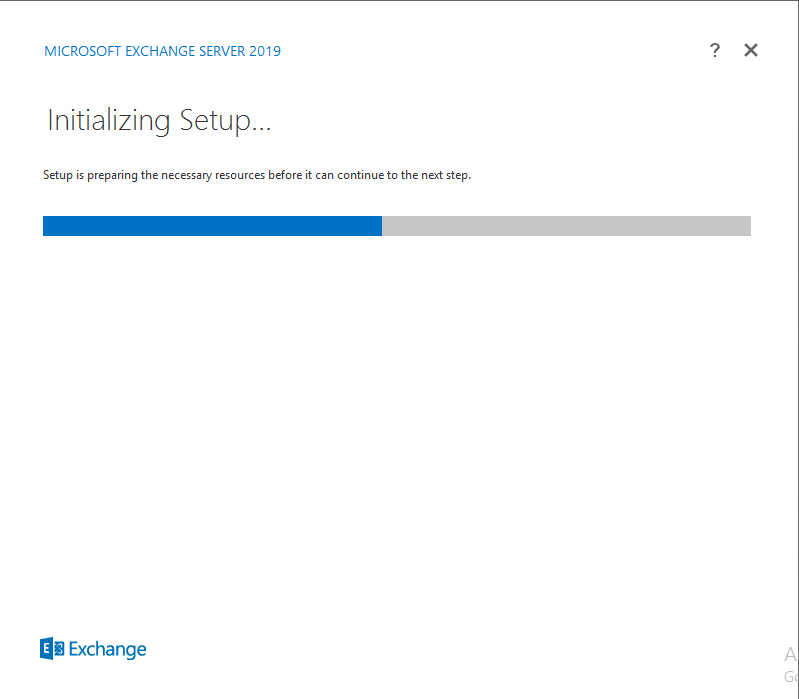
It will take while to copying file, once this is complete. It will initialize setup.
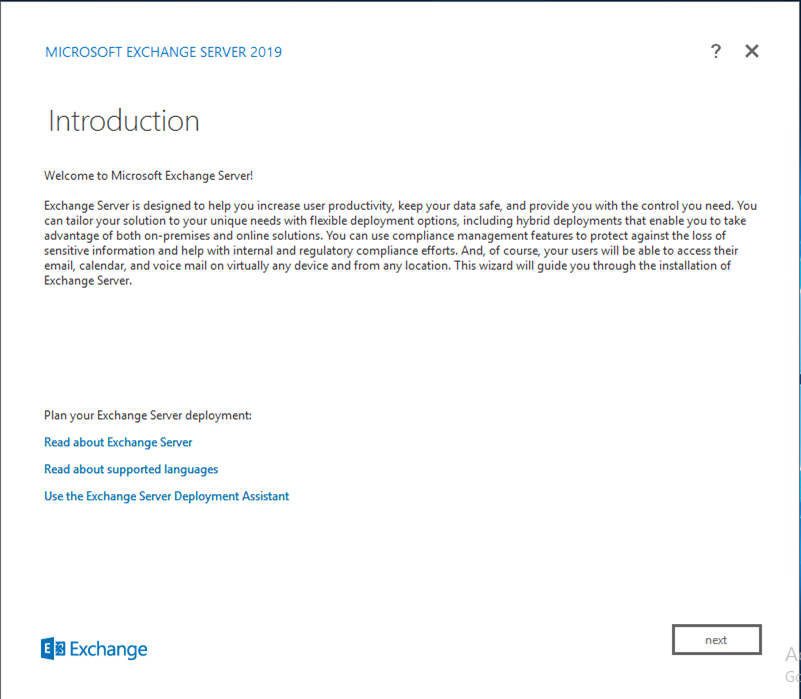
In the ‘Introduction’ page click on ‘Next’.
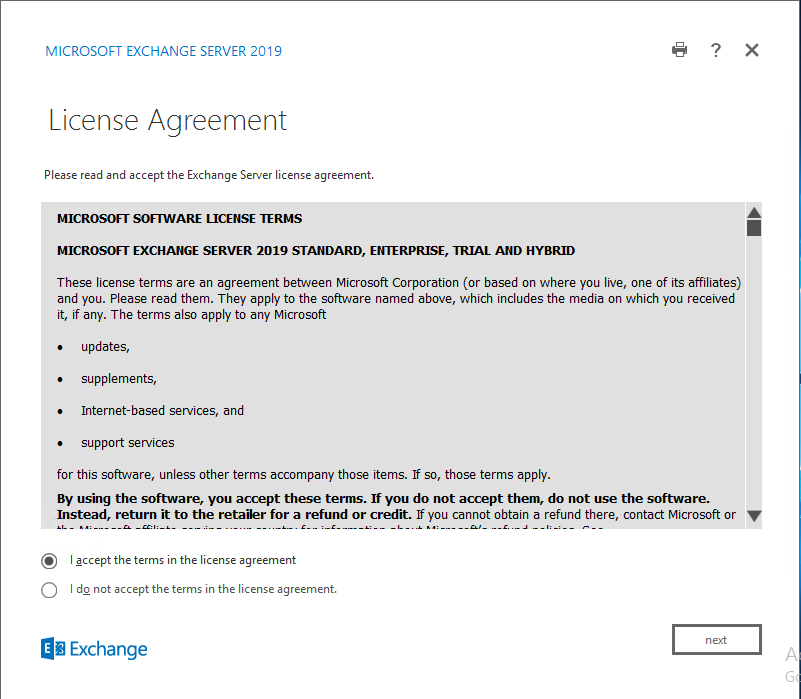
When comes the License Agreement page, request you to read it carefully . Once done, select ‘I Agree…’ and click on ‘Next’.
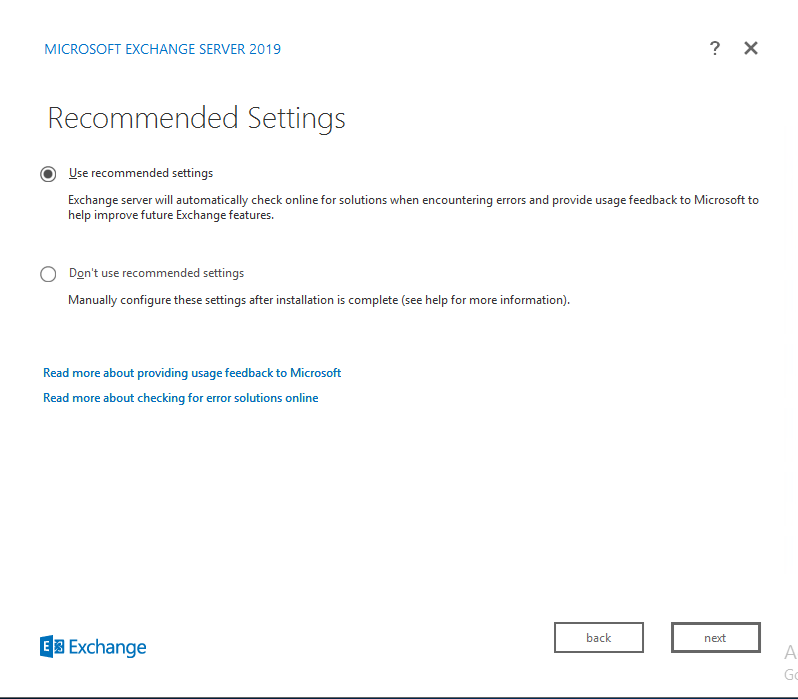
Select on ‘Use Recommended Settings’ on Recommended Settings and click on ‘Next’.
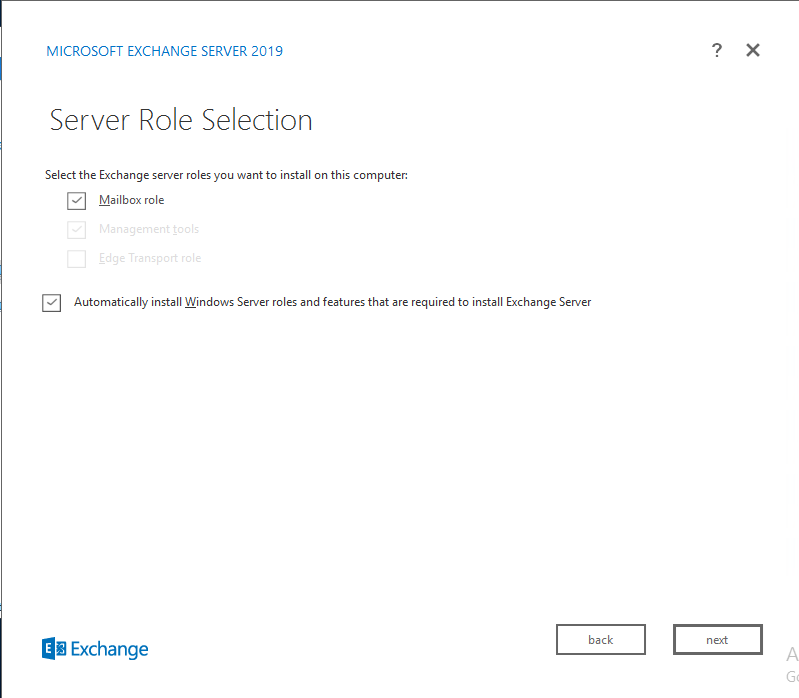
As we are trying to install ‘Mailbox Role’, select one and click on ‘Next’.
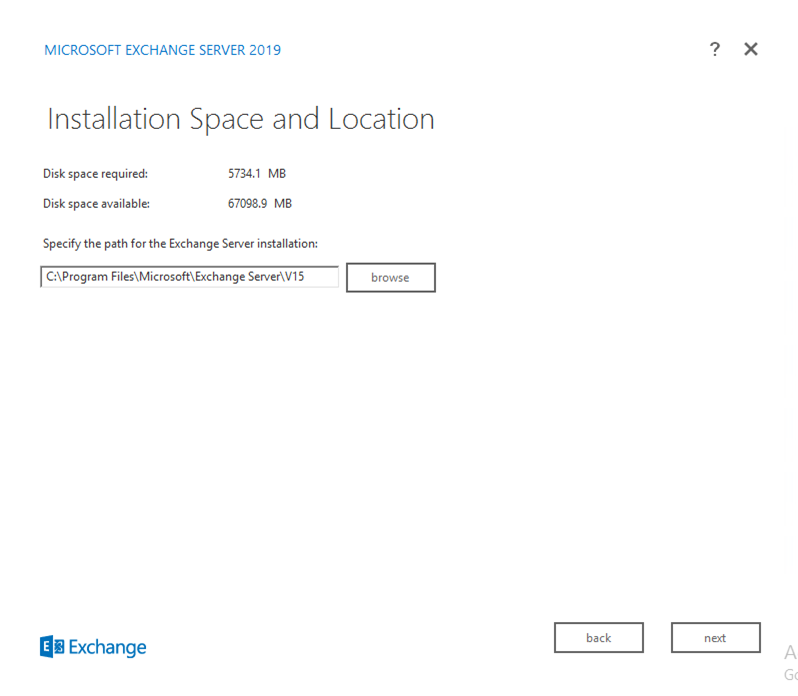
Select the location to install the Exchange 2019 and click on ‘Next’.
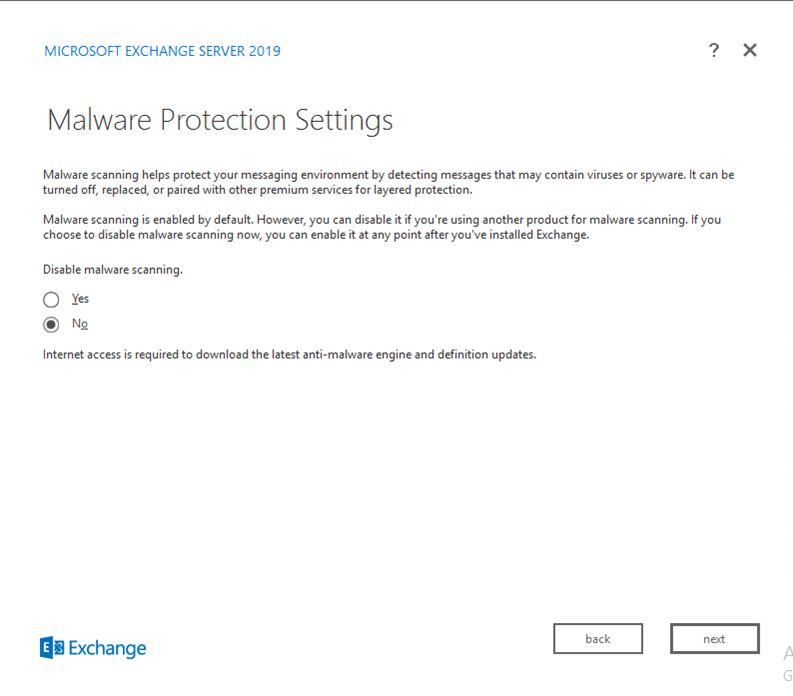
In ‘Malware Protection Settings’ select ‘No’ for Disable malware scanning, and click on ‘Next’.
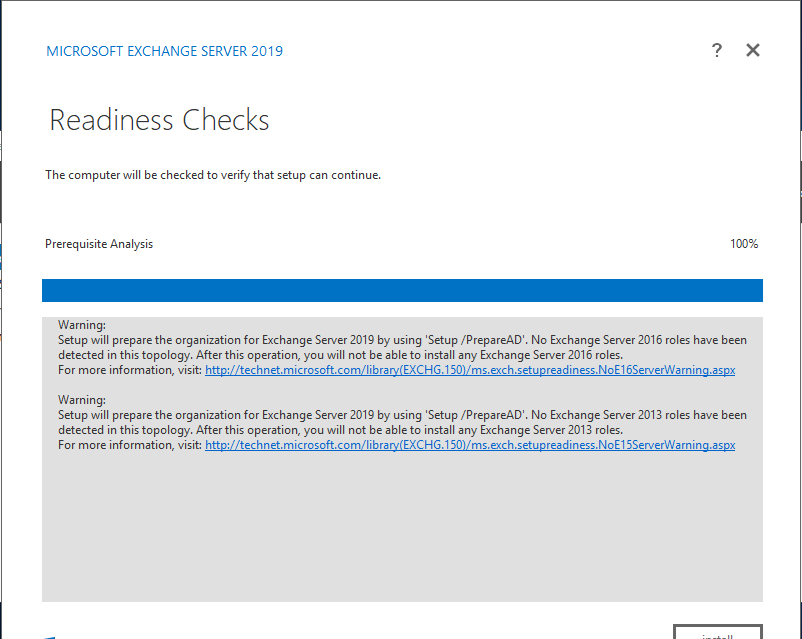
It will take while to check the Readiness and click on ‘Install’ to proceed ahead with installation.
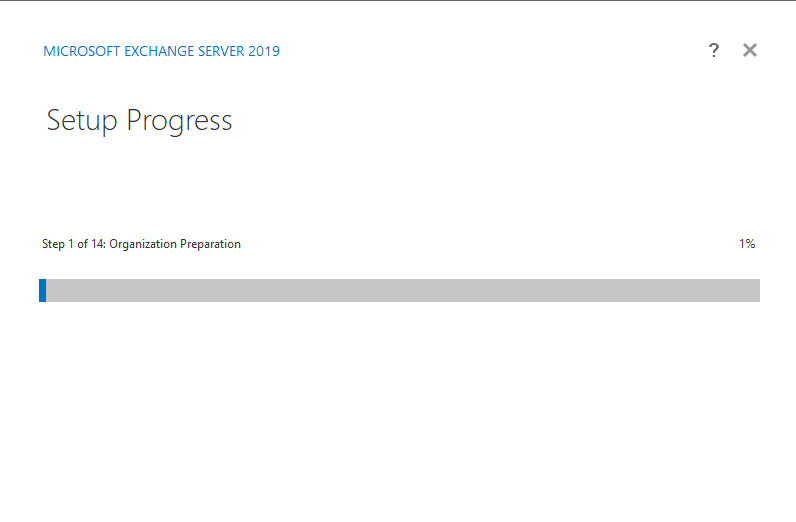
It will take while depending upon the specs of your server or resource you have allocated to your machine.

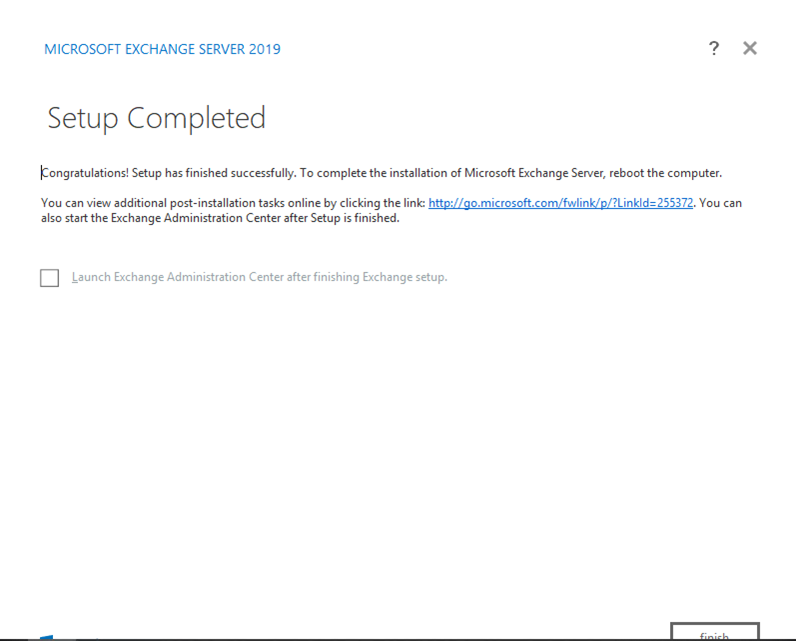
Once Installation is complete, Click on ‘Finish’ and reboot your machine.
[Solved]Error: The Windows Component Server-Gui-Mgmt-Infra isn’t installed on this computer.
![[Step by Step] Installing and Configuring Office Online Server on Windows Server 2016 for Exchange 2016](/wp-content/themes/ribbon-lite/images/nothumb-related.png)
[Step by Step] Installing and Configuring Office Online Server on Windows Server 2016 for Exchange 2016

Cross-Tenant shared channel communication for Microsoft Teams
About Author
pdhewjau
Prashant Dhewaju is a Microsoft MVP and Microsoft 365 Adoption Consultant with deep expertise in cybersecurity and modern workplace solutions. He advises organizations across Nepal and the broader region on securely adopting Microsoft 365, improving productivity, strengthening security posture, and driving effective change management. His prior position as a Modern Work Security Specialist at Microsoft saw him providing invaluable guidance to major clients in Bangladesh, Brunei, Cambodia, and Myanmar, assisting them with their foundational security needs. Awarded the esteemed Microsoft Most Valuable Professional (MVP) accolade in 2017, Prashant is recognized globally among Microsoft peers. Since 2010, he has imparted his expertise as a Microsoft Certified Trainer (MCT), conducting specialized training across Nepal.